
Connect a new ezeep Hub to your printers and print a test page. Already connected? Manage printers on the Hub.
Before you start
- An ezeep organization with administrator access to the ezeep portal. Create an organization if needed.
- The Hub, its supplied power supply, and Ethernet or Wi-Fi network access.
- Printers switched on. For automatic discovery, keep network printers on the same subnet as the Hub; connect USB printers directly.
- Internet access: outbound TCP 443 to
*.ezeep.comand TCP 8883 to*.azure-devices.netfor remote management.
[Step] 1. Connect the Hub to power and your Ethernet or Wi-Fi network
Connect the supplied power adapter to the micro-USB power port, USB icon facing down, and plug it in. The red front LED lights up.
Connect with Ethernet
Connect the Hub by Ethernet to your network switch or outlet. Continue to Claim the Hub.
Connect with Wi-Fi
- Before changing networks, download Hub Finder from Apps & Downloads in the ezeep portal.
- Connect your computer to the temporary
TPHub-xxxWi-Fi network (available for 10 minutes after startup when enabled). - Open Hub Finder and select the Hub’s IP address.
- Sign in to the Hub console. The factory administrator password is
print4lifeif unchanged. - Under Network → Wi-Fi, select the printer network and enter its password.
- Reconnect your computer to its usual network.
For hidden Wi-Fi or a static address, see Hub network settings.
[/Step]
[Step] 2. Select Claim Hub and enter its MAC address and administrator password
- In the ezeep portal, open Connectors → +Claim Hub.
- Enter the MAC address printed on the Hub and its administrator password (
print4lifeif unchanged). - Select Claim and confirm the Hub appears under Connectors.
Claim failed? Check the claiming error.

[/Step]
[Step] 3. Select Show connected printers, choose each printer’s Model and save
- Under Connectors, find the Hub and select Show connected printers. Network Printers opens, filtered to that Hub.
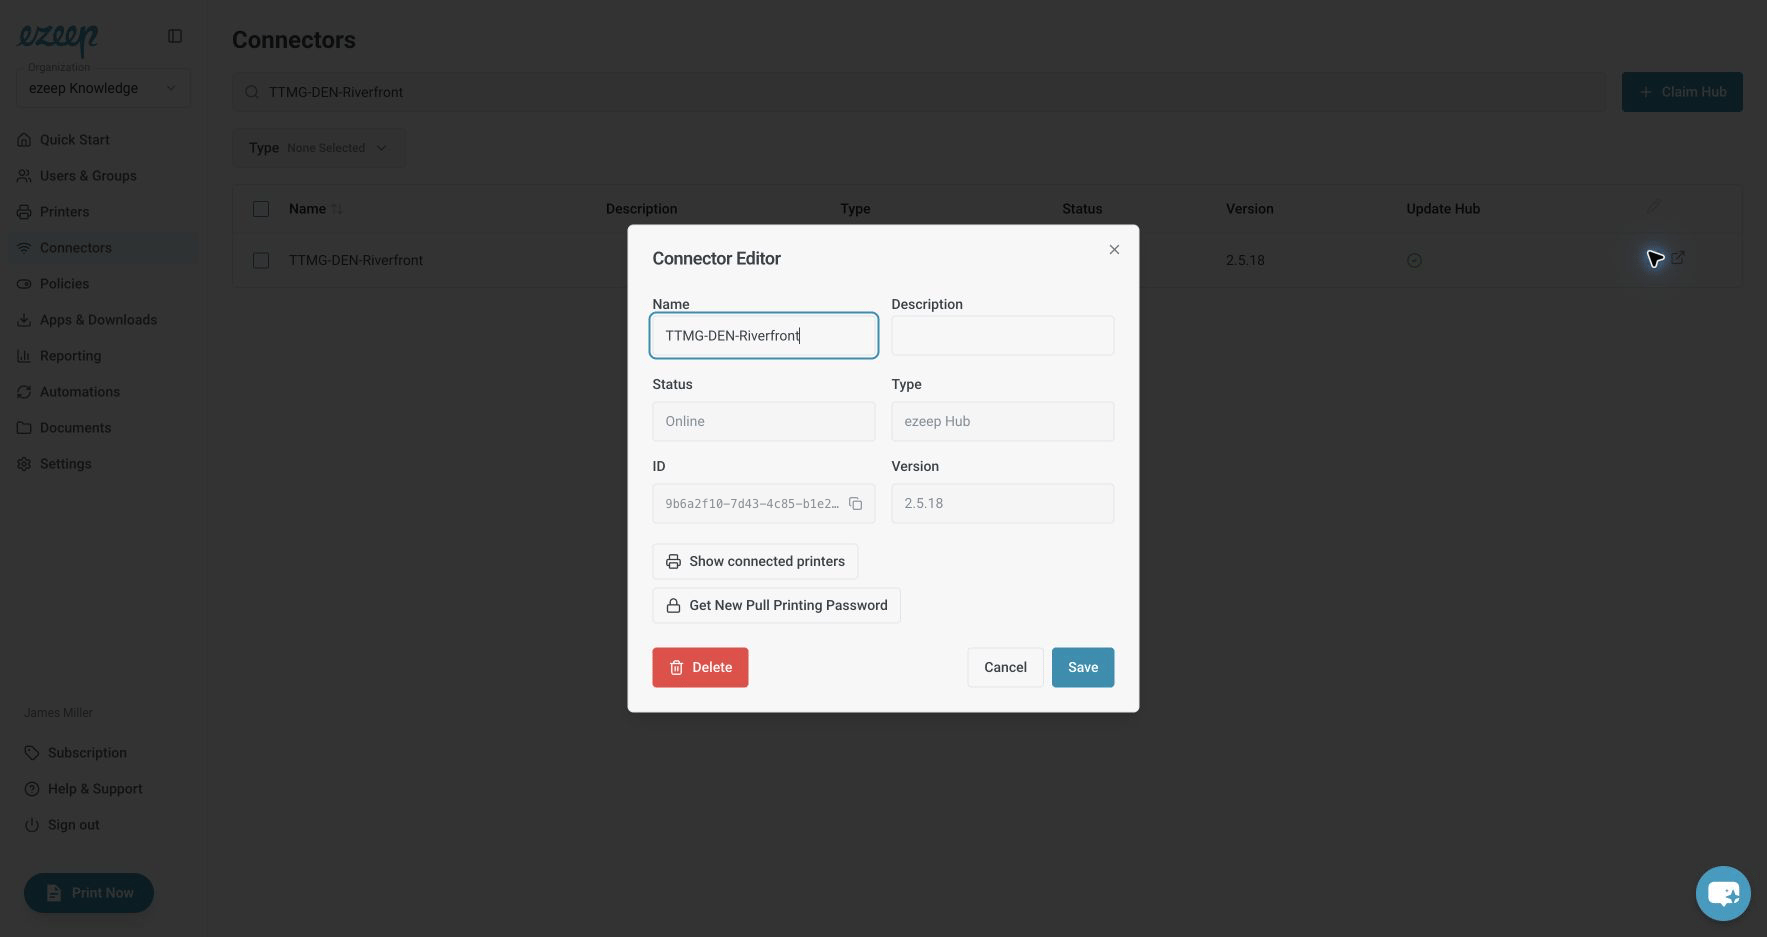
Open the Hub’s Connector Editor and select Show connected printers. - Edit each printer, choose the matching Model (find your printer model), and select Save.
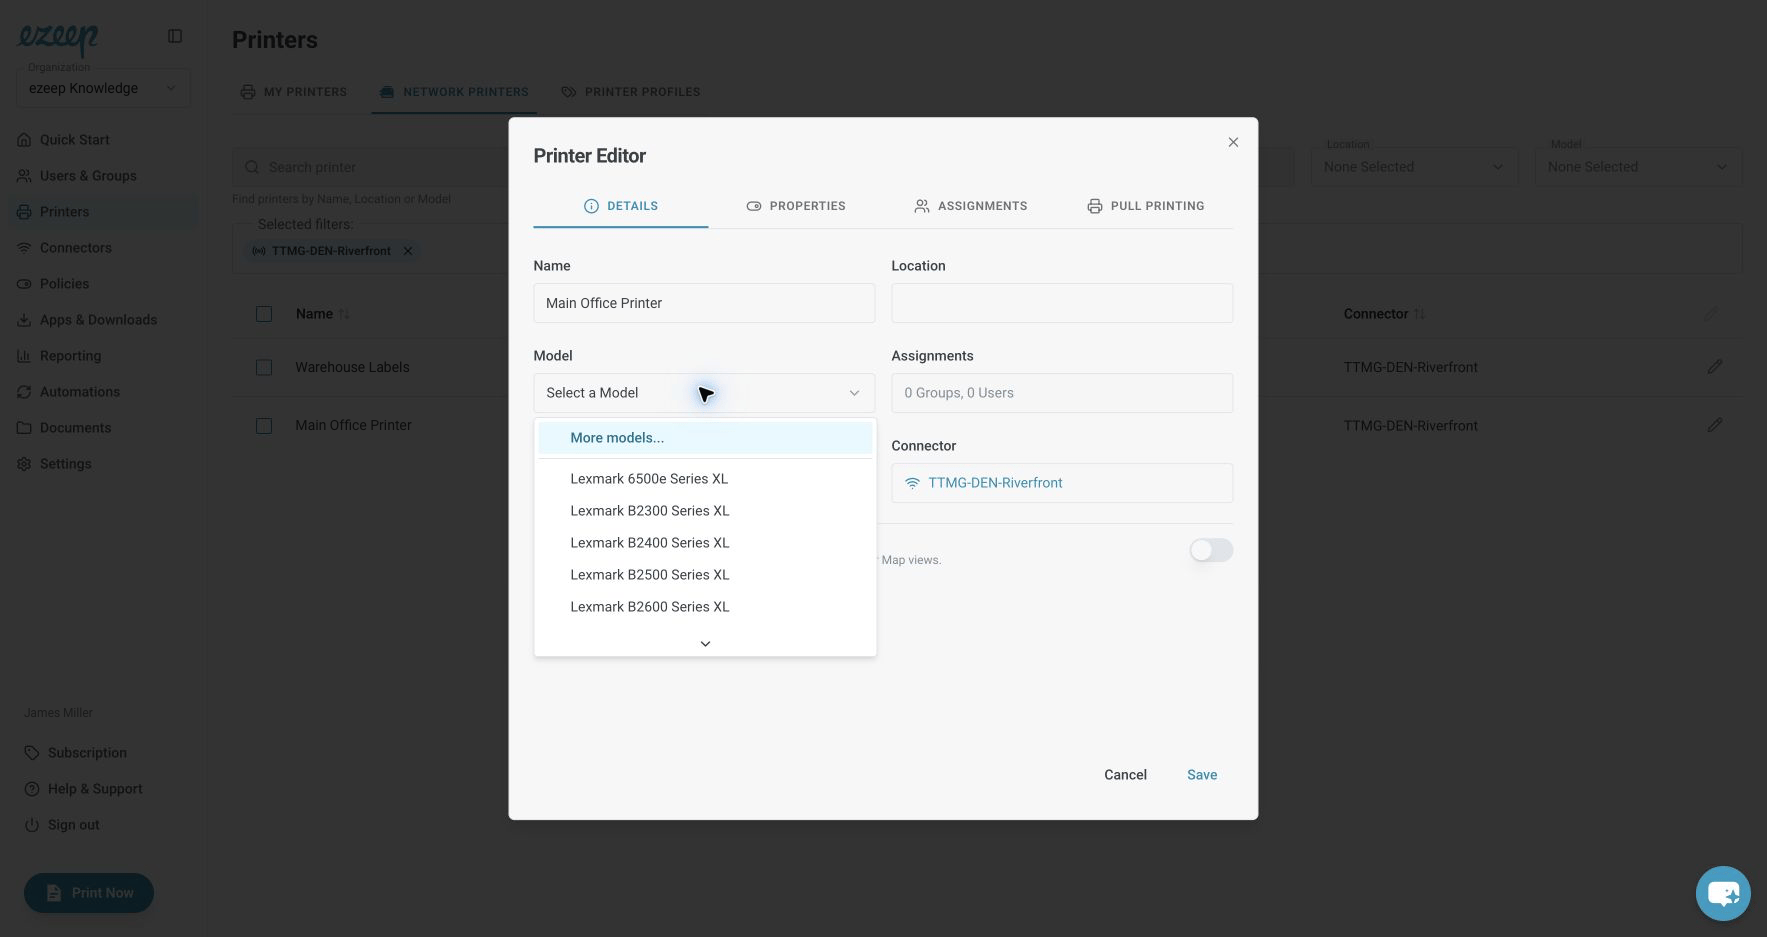
Open Model to choose a matching driver. Select More models to search the wider list.


A model missing from the list? Check driver alternatives. Printer missing from the Hub? Find or add it.
[/Step]
[Step] 4. Assign the printer to a test user or group and print from the browser
- Assign the printer to your test account or group.
- Print from the browser to verify the connection.
An assigned printer is enabled for the user automatically.
[/Step]
Finish setup
Change the default Hub password. To add colleagues later, choose a user onboarding method. For card release, see NFC setup.